On my current project at work, we sometimes need to record a meeting, unfortunately the recording feature of the meeting software isn’t enable. As such I’ve written a short guide on how to use OBS Studio and thought, I’d share it on here as well.
Open Broadcaster Software (OBS) Studio was, as the name implies, originally developed as streaming software open source alternative to things like XSplit, but over the years has also become one of the best video screen recording software.
Due to it’s original intend, the software offers a lot of options, like scenes, transitions between scenes, complex compositions, multi-stream support, webcam capture, etc. But I’ll focus on the most basic feature set to record a meeting.
Setup
- Download & install OBS: https://obsproject.com/
- Start OBS Studio (64bit)
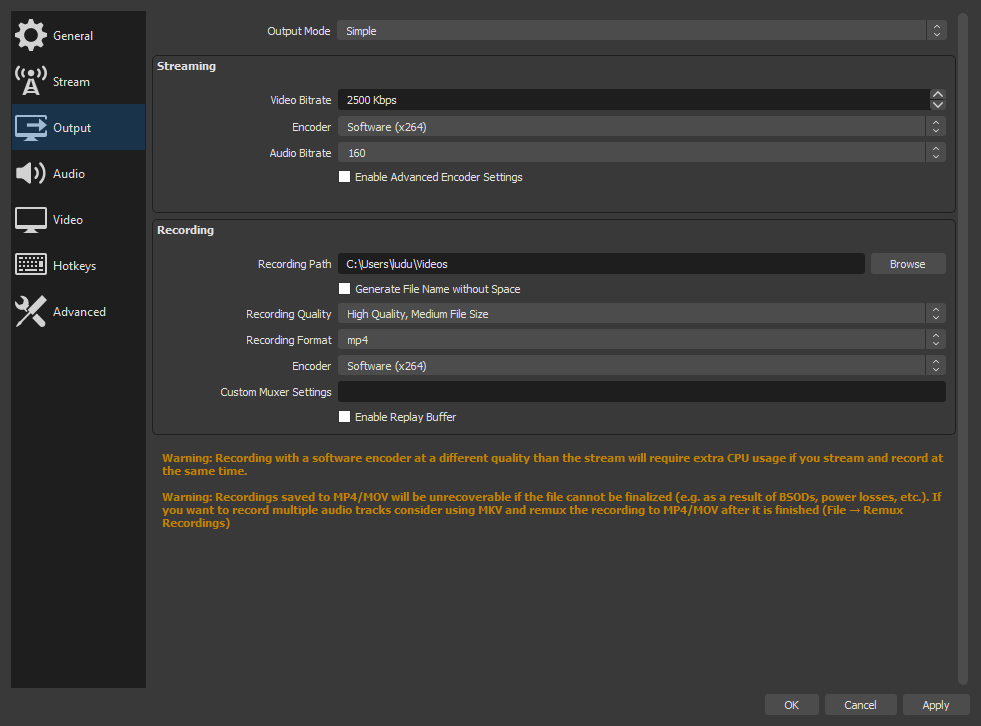
Output Settings
- Open the Settings & navigate to the tab ‘Output’
- Keep ‘Output Mode’ set to ‘Simple’
- Under ‘Recording’
- Set the directory where the recordings should be saved to by setting the ‘Recording Path’
- For ‘Recording Quality’ select ‘High Quality, Medium File Size’
- For ‘Recording Format’ select ‘mp4’
- For ‘Encoder’ select ‘Software (x264)’
Audio Settings
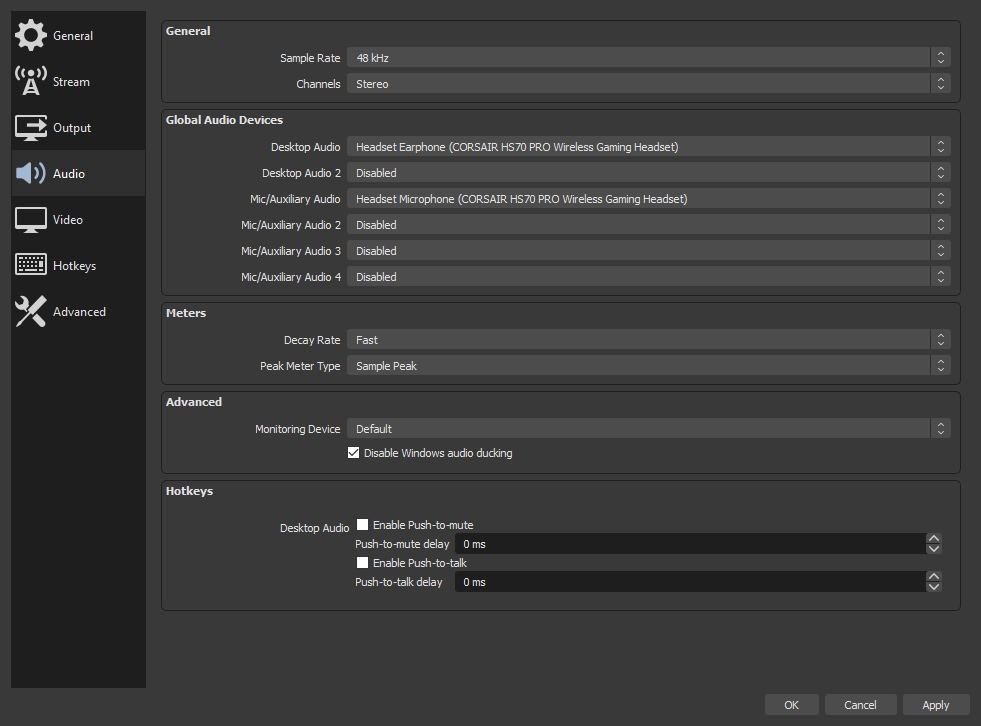
- Open the Settings & navigate to the tab ‘Audio’
- Select for ‘Desktop Audio’ the output audio device you’ll be using during the meeting
- Select for ‘Mic/Auxiliary Audio’ the input audio device you’ll be using during the meeting
Videos Settings
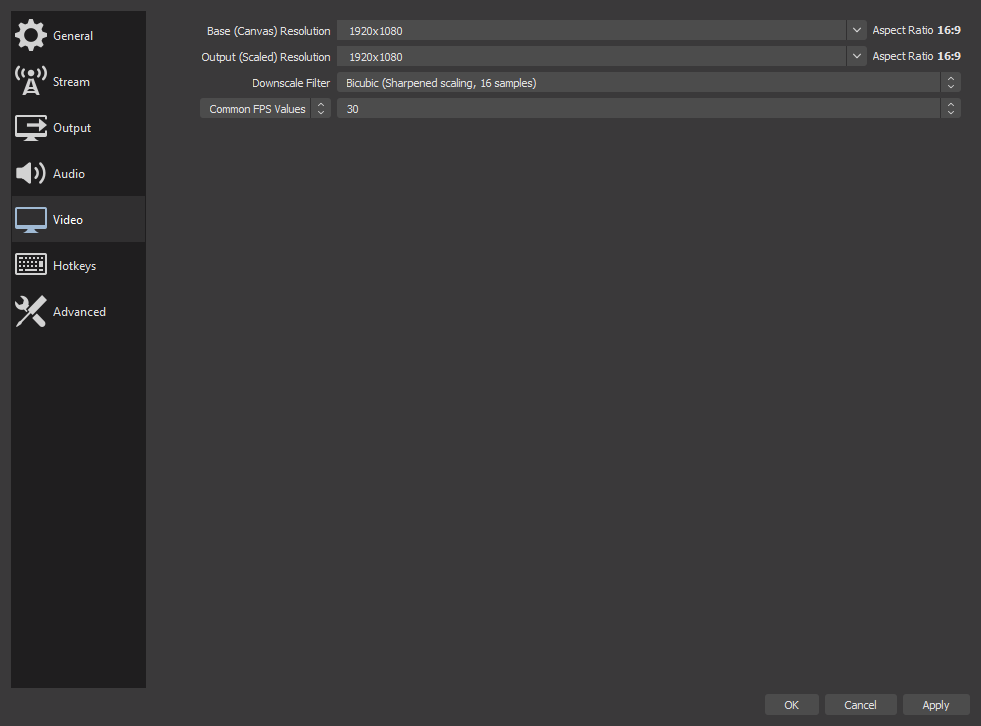
- Open the Settings & navigate to the tab ‘Video’
- Select for ‘Output (Scaled) Resolution’ 1920×1080
- Select for ‘Base (Canvas) Resolution’ 1920×1080
- Select for the FPS ‘Common FPS Values’ and as value ’30’ or ’24’
Composition
- In the ‘Sources’ window at the bottom click on the ‘+’ and select ‘Window Capture’
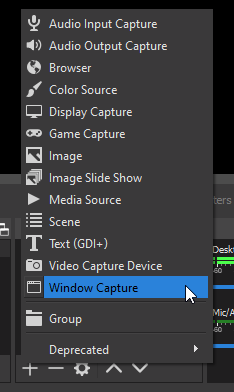
- Give it a name and click ‘OK’
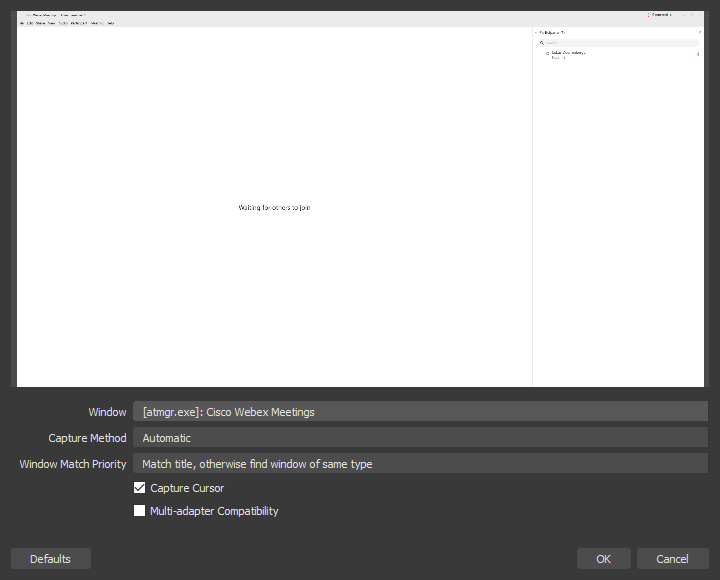
- Select for ‘Window’ the process name and window title of the application you want to capture
- For a WebEx meeting that would start with ‘[atmgr.exe]: Cisco Webex Meetings’
- Leave ‘Capture Method’ on ‘Automatic’
- Check the ‘Capture Cursor’ checkbox, unless you don’t want your cursor recorded
- Click ‘OK’ to confirm the changes for the window capture source
- In the preview window, you’ll now see the meeting window displayed
- If it’s the wrong window, double-click on the window capture source and select a different window
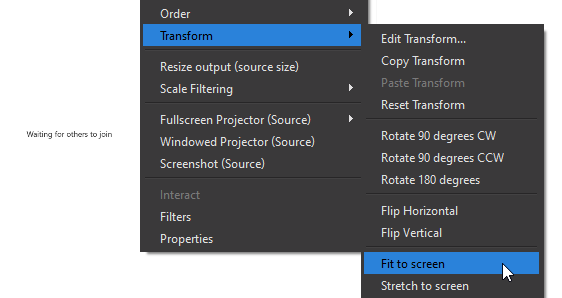
- If the window doesn’t fit on the canvas (too small, too large, only part shown):
- Make sure your meeting window is maximized and/or in fullscreen
- Right-click on the preview window, select ‘Transform > Fit to screen’
Audio Mixer
- In the ‘Audio Mixer’ section at the bottom you should be seeing two faders for the Desktop Audio and Mic/Aux recordings
- Very important: If you’re not an active speaker, you need to mute the mic input by pressing the speaker symbol
Otherwise your breathing and talking with someone else, as well as background noises will all be recorded! - If you’re an active speaker, it’s still recommended to mute yourself when others are talking.
- Alternatively, if you mic has a hardware switch, you can also use that to mute the microphone itself
- From my experience it makes sense to turn down the mic volume 2-3dB, as the audio output isn’t as strong
- Very important: If you’re not an active speaker, you need to mute the mic input by pressing the speaker symbol
- Once everything is ready, you can click the “Start Recording” button on the bottom right
- Make sure you test your initial setup by recording a few seconds to make sure the video and audio output is correct
Advanced: Audio Multitrack
If you intend to record other speakers and your own microphone, it might be advantageous to record the two audio sources separately, so you can later one level and mix them independently.
Open the settings
- In the Audio tab, ensure you’ve selected multi audio devices to record from
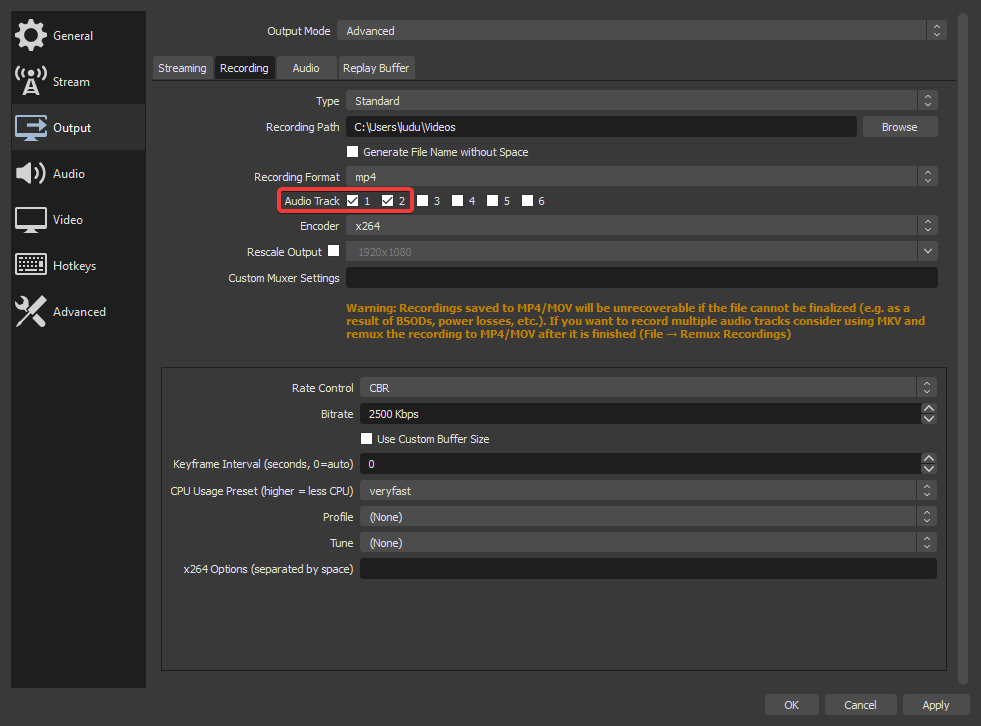
- In the Output tab, for the ‘Output Mode’ drop down, select the ‘Advanced’ options
- In the ‘Recording’ tab
- For ‘Recording Path’ select the directory where the recordings should be saved to
- For ‘Recording Format’ select mp4
- For ‘Audio Track’ select 1 and 2
- For ‘Encoder’ select ‘x264
- Right-click in the ‘Audio Mixer’ section and select ‘Advanced Audio Properties’
- For the desktop audio device make sure only Track 1 is selected
- For the microphone audio device make sure only Track 2 is selected

- Once everything is ready, you can click the “Start Recording” button on the bottom right
- Make sure you test your initial setup by recording a few seconds to make sure the video and audio output is correct